The Blockpad environment
This page covers "how to get around" Blockpad outside of using the program directly, including topics like file management and licensing.
Accessing Blockpad
Blockpad is available on Windows, Mac, and online. Each option has different benefits and uses.
Windows, Mac, and Online
Blockpad was originally developed for Windows, so generally speaking, the windows app is more developed and has better performance. The Mac app and the web app are both fully functional, but may be slightly behind in some features.
For the Windows and Mac app, your files stay on your computer with conventional file management. The web app files are stored online, and you can access them anywhere. You also have the option to share a link with colleagues, who will also be able to edit them.
Whichever you decide to start with, Blockpad files are all the same and can be opened by the Windows, Mac, and web apps, so you can switch from one to the other without any major complications.
Start online
There are a few ways to access the web app, all of them pretty straightforward.
Access the web app from the homepage:
- Go to the Blockpad homepage in your browswer.
- Click the Open web app button.
- Select New document, New spreadsheet, or New drawing.
- Go to the Blockpad homepage in your browswer.
- At the top of the page, hover over Get started.
- Select an option under Web app, e.g. New document.
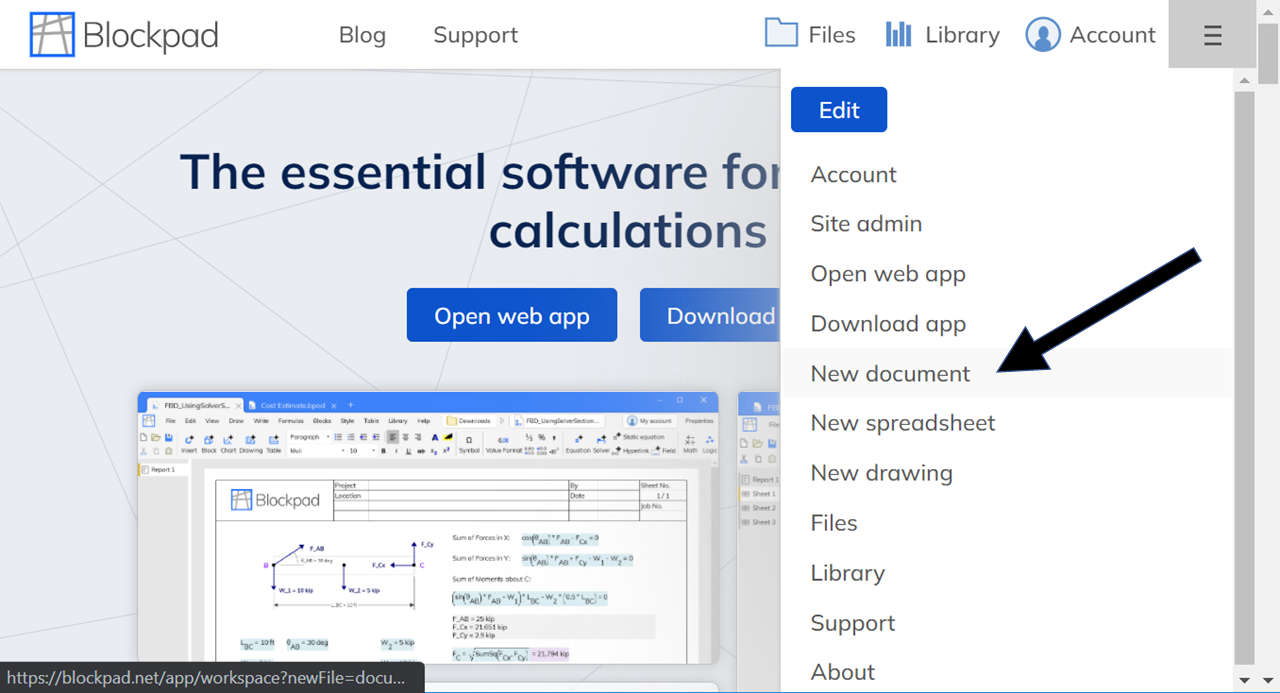
Access the web app from anywhere on the Blockpad website:
- Click the menu icon in the top right corner of the page.
- Select New document, New spreadsheet, or New drawing.
You can also access the web app by using a link to a web app file. or by opening a file from your online folder.
Note that when you access the web app and choose between document, spreadsheet, or drawing, you are not choosing between different file types.
A Blockpad file supports all of these document types. What you are selecting is the inital top level frame for the new document.
Start on the Desktop
To use the desktop app, you will have to download the software to your computer.
Download the desktop app:
- Go to the Blockpad homepage in your browswer.
- Hover over Get started at the top of the page.
- Select Download from the dropdown list.
- Click the Download button.
- If you don't have an active paid or education license, you will be prompted to start a free trial.
- Follow steps to install the software.
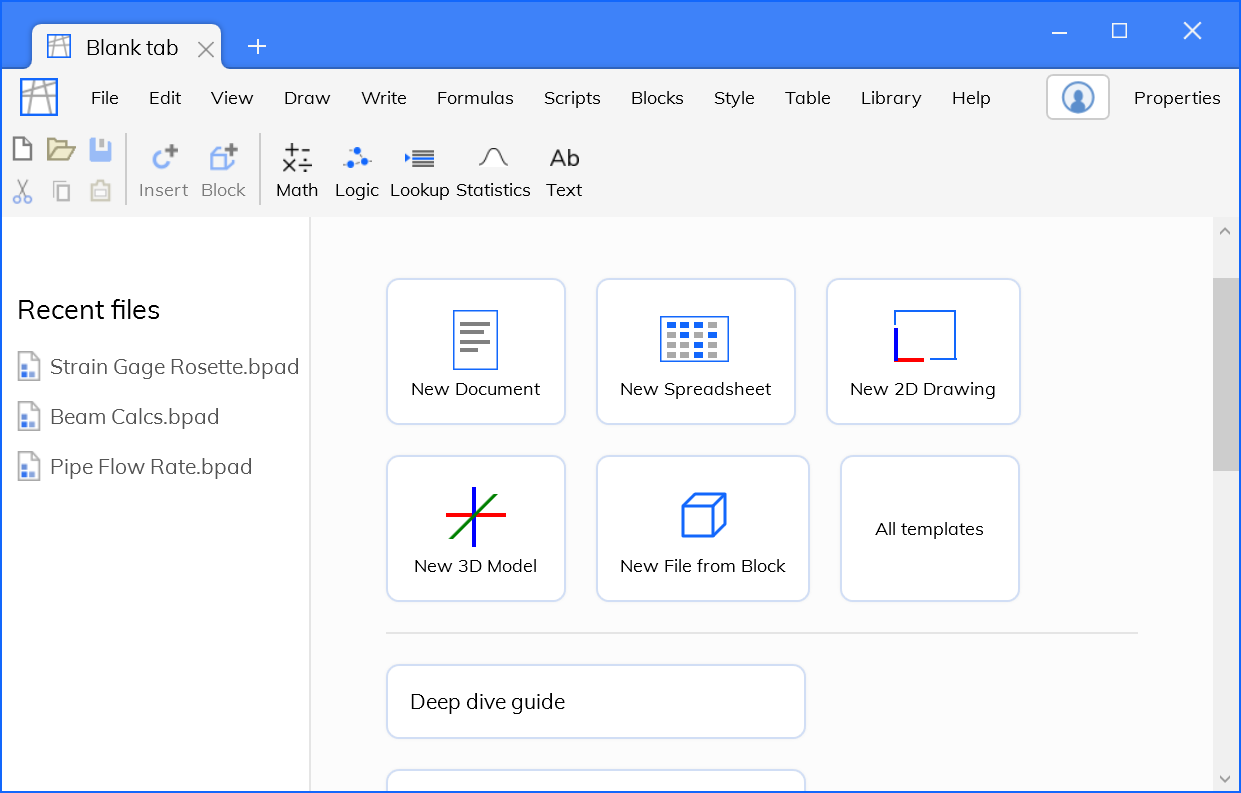
- Once the program is installed, open Blockpad from the start menu.
- The program will open with a blank tab.
- From there, select New Document.
Using the app
This page is not about how to actually use the app to create calculation documents, but how to work with things in the Blockpad environment, like saving online files.
Learning resources
Resources for learning Blockpad can be found on the support page, but below is a list of the options.
- Blockpad for beginners
- Quick start guide
- Walkthrough video
- Example files
- Deep dive guide
- Units page
- Blockpad Linkedin page
In addition to these, there are also individual pages for different tools. If you can't find what you're looking for, we suggest searching on google along with the word "Blockpad". E.g. "Blockpad solver section"
We are also very responsive to questions asked through our contact page. If you have any question, large or small, we'll be happy to help!
The toolbar
The Blockpad toolbar is like most conventional toolbars.
There are the typical File, Edit, and View drop down menus, along with a number of options specific to Blockpad.
The shortcuts that appear beneath the drop down menus are context dependent. You will see different tools depending on whether you are in a report, spreadsheet, or drawing.
Top level frames
The list to the left of the screen contains "top level frames". These are a lot like sheets in a conventional spreadsheet. They are all inside of the file you have open, and you can reference values between them.
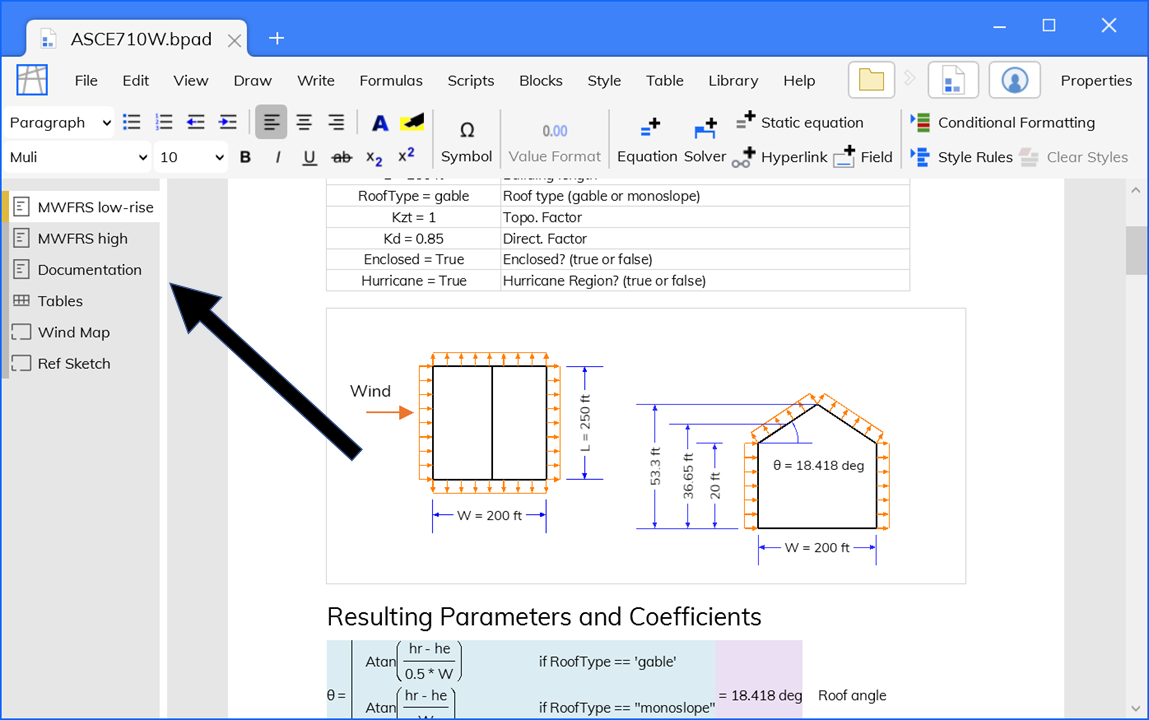
Unlike spreadsheet sheets, top level frames can be different types of "document". The most common for Blockpad is the word processor style document called a report, but you can also have spreadsheet, drawing, and notebook top level frames.
Insert a new top level frame:
- Hover over the list to the left of the page.
- Click the plus sign that appears.
- Select the top level frame style.
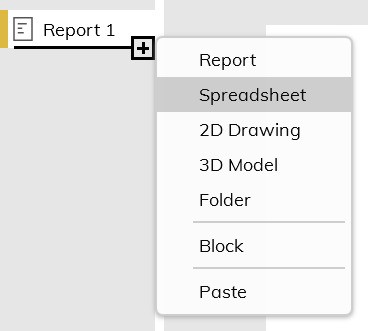
Copy and paste a top level frame:
- Right click the frame you wish to copy and select Copy.
- In the new location (or file), hover over the list of top level frames.
- Click the plus sign that appears.
- Select Paste.
Properties window
You can use the properties window to control the properties of different objects in Blockpad.
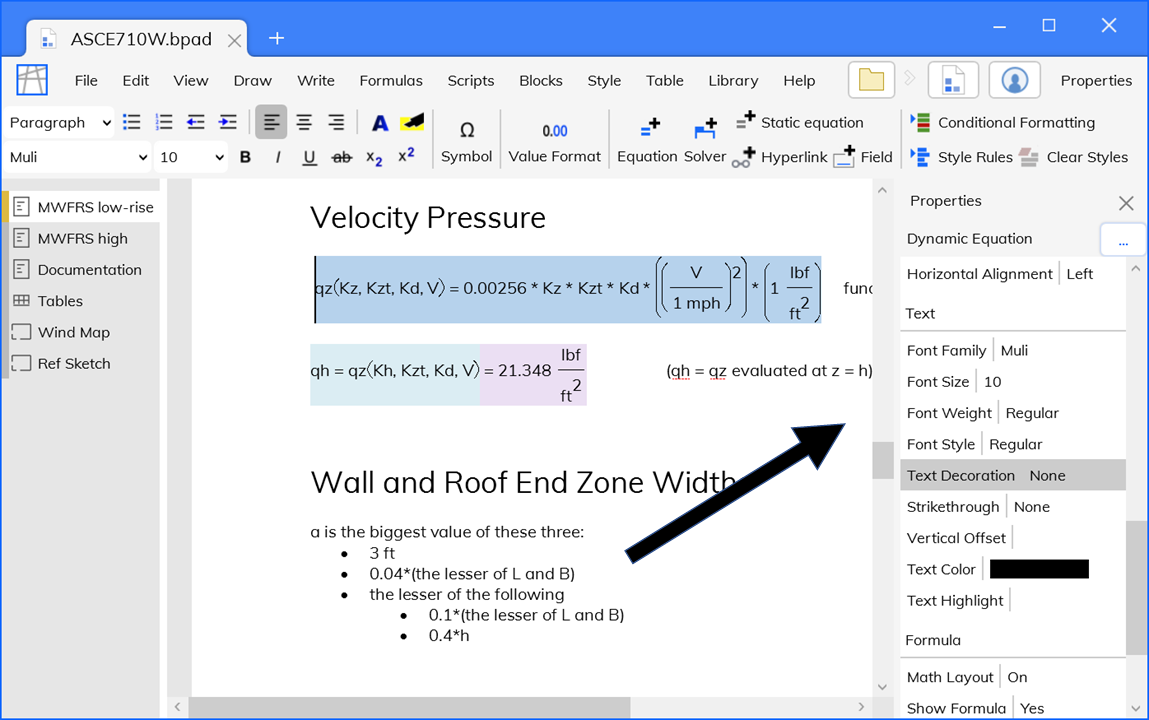
Most properties in the properties window are used to control formatting, although there are a few that control how objects are used in equations, (like Name or Capture Values). For example, you can use the properties window to set text size, cell background, or line pattern.
You can also use the toolbar to set many of these properties, but the properties window is a one-stop shop for any and all properties controlling an object.
If you're not sure how to set some kind of formatting, the properties window is a good place to look first.
Open the properties window:
- Option 1: Click the Properties button in the top right of the app.
- Option 2: Select Edit>Properties in the toolbar.
- Option 3: Right Click>Properties.
- To open the properties window for a top level frame, select the frame 1st, the right click.
- Option 4: Press the F4 key
Navigation tree
Use the navigation tree for an easy way to get around your file.
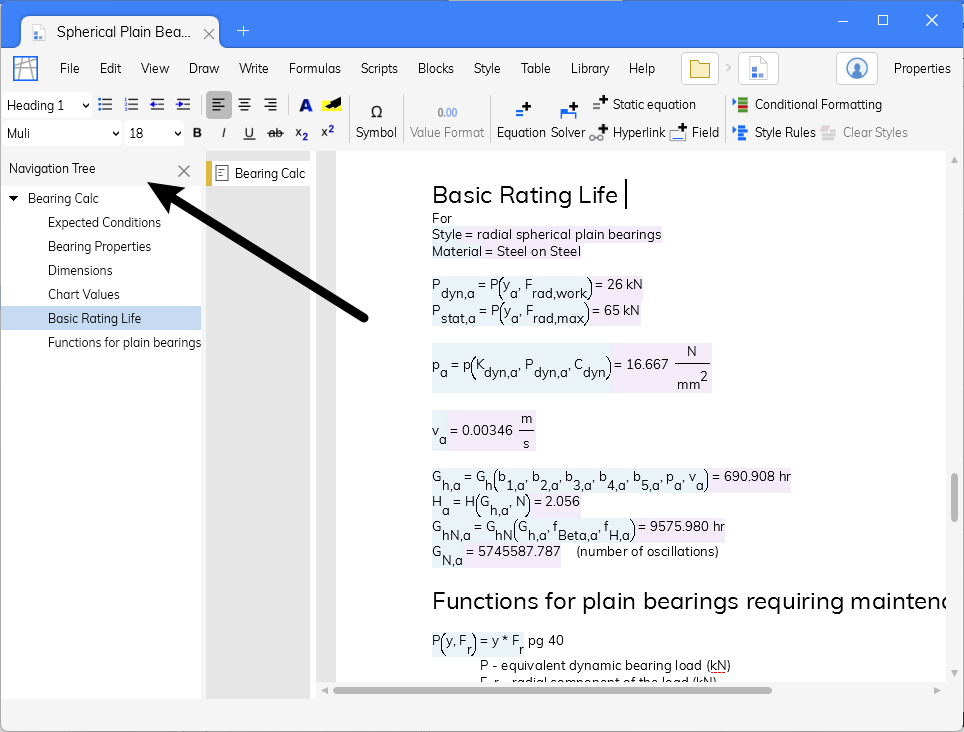
The navigation tree shows a list of all top level frames with all of the headings, sections, tables, and drawings inside. When you click on something in the navigation tree, you move to that place in the file.
Show the navigation tree:
- In the toolbar, select View>Navigation Tree.
Keyboard shortcuts
Below is a list of shortcuts available in Blockpad. Some are unique to Blockpad, but most are typical of documents and spreadsheets.
If there is a shortcut you would like in Blockpad, please let us know.
| F2 | 1. Edit the selected cell 2. Toggle formula edit style |
| F4 | 1. Opens and closes the properties window 2. When inside a formula, makes cell references absolute |
| F5 | update all formulas |
| F6 | Open formula browser |
| F7 | Open value browser |
| F12 | Go to reference |
| Ctrl + K | Opens the insert tool |
| Ctrl + \ | Opens the symbol tool. Start typing to select the symbol and press enter. |
| Shift + F2 | Opens the console |
| Shift + Enter |
1. In a spreadseet, enters the cell contents and moves up a cell 2. When inside a formula, starts a new line in the editor |
| Ctrl + Shift + B | Insert block |
| Ctrl + Space | Clear style |
| Ctrl + T | New tab |
| Ctrl + A | Select All |
| Ctrl + C | Copy |
| Ctrl + X | Cut |
| Ctrl + V | Paste |
| Ctrl + Z | Undo |
| Ctrl + Y | Redo |
| Ctrl + Arrow | Skip to end |
| Shift + Arrow | Select as you move |
| Ctrl + Shift + Arrow | Skip to end and select between |
| Page up key | Go to the next page up |
| Page down key | Go to the next page down |
| Ctrl + S | Save |
| Ctrl + N | Create new file |
| Ctrl + O | Open a file |
| Ctrl + P | |
| Ctrl + Shift + '+' | Zoom in |
| Ctrl + Shift + - | Zoom out |
| Ctrl + Shift + 1 | Zoom 100% |
The online environment
Basic file operations
New files
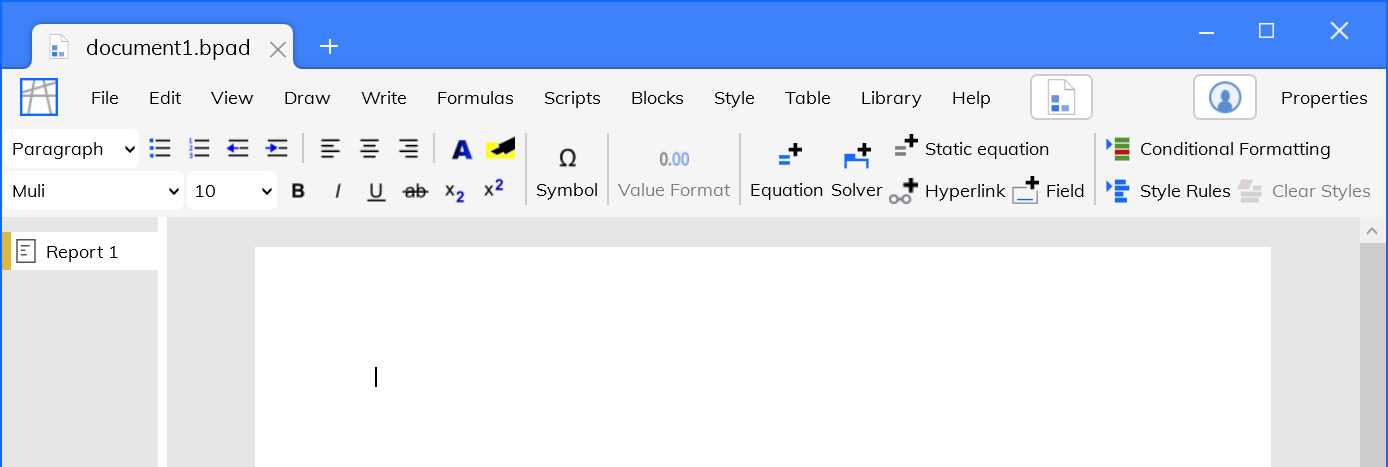
If you've followed the steps above for opening the web app, then you've created a new file. You can always create a new file by following those steps.
You can also create a new file by selecting File>New in the web app toolbar. Doing this will start a new file in a new web browser tab.
When you create a new file in the web app, that file is automatically given a name (e.g. Document 3) and saved in your online folder. To give the file a new name, rename it from your online folder.
Rename a file:
- Navigate to the file in your online files folder.
- Select the file.
- In the right of the page, select Rename.
- Type in the new name (with or without .bpad extension).
- Click Rename.
It is also possible to use File>Save as in the toolbar to "rename" a file, but this just duplicates the file, leaving the original in your online folder. Doing this a lot will clutter your folder unless you delete the old files with the original name.
Open files
You can open your online files directly from the web app. Select File>Open in the toolbar, then choose the file.
You can also open them from your online folder.
Open a file from the files folder
- Navigate to the file in your online files folder.
- Select the file.
- In the right of the page, select Open.
Online files folder
All of your online files are saved in your personal files folder. This is where you can access and manage your files.
Access your files folder:
- On the Blockpad homepage, select the Files icon in the top right of the page.
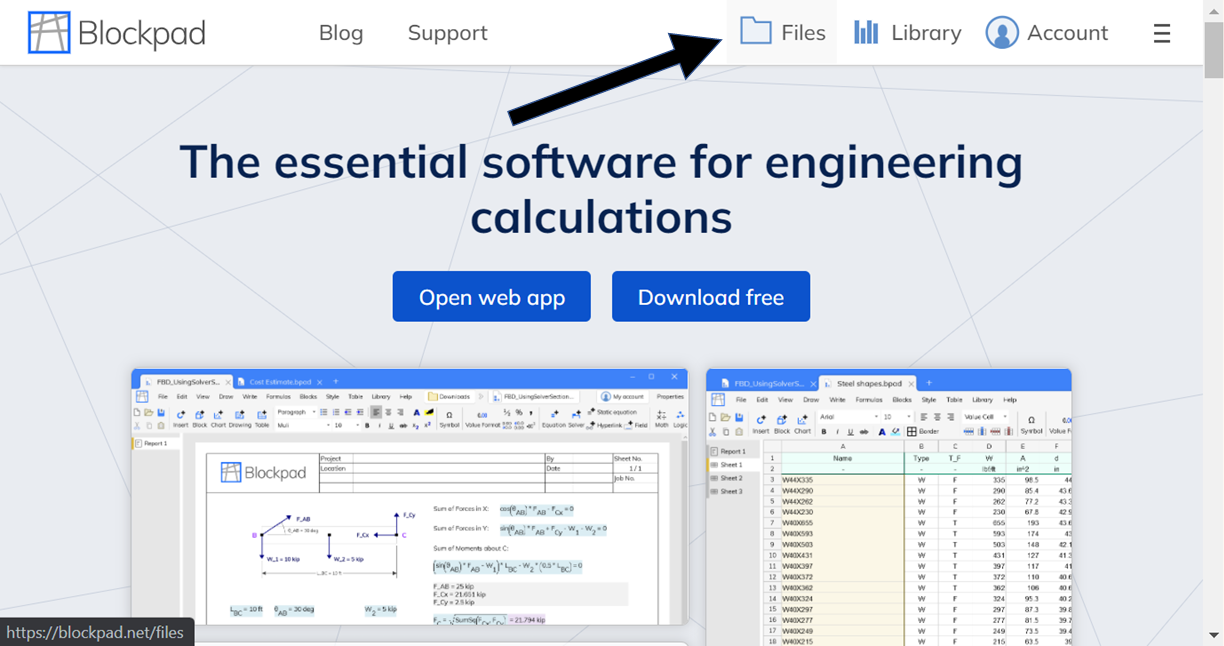
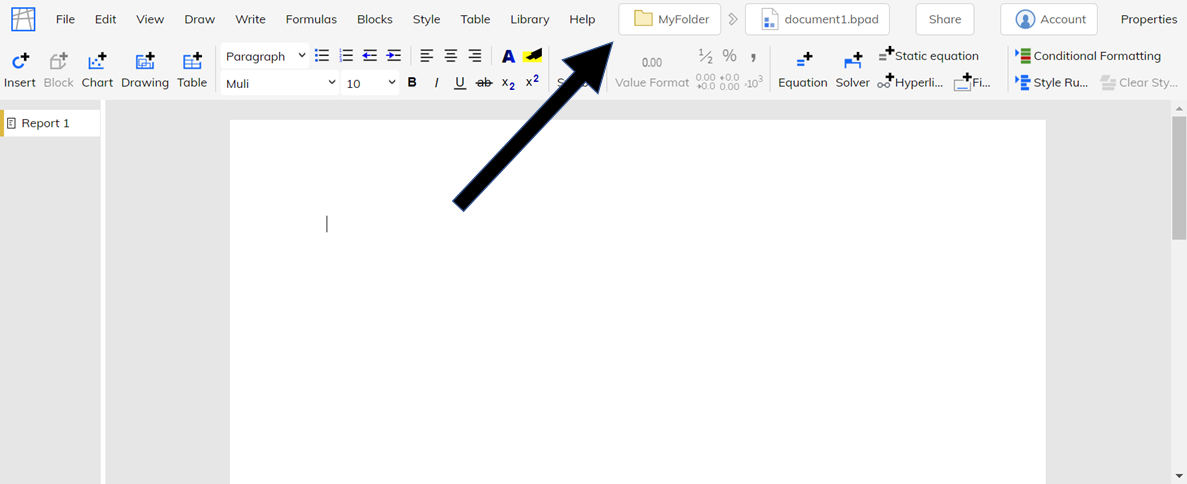
You can also access the files folder from the web app by clicking the named folder in the top right of the page. This will bring you to the folder the file is stored in.
Once in the folder, you can view all of your files and create sub-folders to store them in.
When you click on a file in your folder, you'll see file management options appear to your right. From here, you can open, download, share, rename, replace, and delete a file.
Uploading and downloading
The web app and the desktop app use the same file type, and you can move your files from one to the other.
Upload a file from your computer to the web app:
- Navigate to your online online files folder.
- (Optional) - Navigate to the folder you want the uploaded file to be located in.
- Click the Upload Files button.
- Click Choose Files.
- Select the file you wish to upload and click Open.
- Click Upload Files to complete the upload.
- You should now see the uploaded file in your online folder.
- To open the file, select it in the folder and click Open in the right side of the page.
Some desktop app tools are not enabled in the web app, so while you can open desktop app files in the web app, you may not be able to edit some parts. E.g. custom headers
Download a file from the web app to your computer:
- Open the file in the web app.
- Select File>Download in the toolbar.
Or
- Navigate to your online files folder.
- Select the file you wish to download.
- Click the Download button in the right of the page.
Sharing and coauthoring
You can share and coauthor Blockpad files in the web app. Multiple people can work on the same file, and those changes will be reflected to everyone.
Files can be shared with editing or read-only permissions, in case you want someone to be able to look at the file but not change anything.
A side note - you can also share tools like custom functions or blocks through the Blockpad library.
To share a web app file, first set the sharing permissions, and then send the person a link to the file itself.
Set file sharing permissions:
- Open the file in the web app.
- Click Share in the top right of the page.
- In the page that opens, click New Rule.
- Using the drop down lists, select who can access the file, and what they can do.
- See below for descriptions of the options.
- Click Add Rule.
Share a link to the file:
- Open the file in the web app.
- Copy the URL in your browser, this is the link you will share.
- Share the link via the medium of your choice, e.g. email or messaging.
File sharing rules
When sharing a file, you create rules that specify who can access it and what kind of access they have.
You can create multiple rules to layer who has access. E.g. one other coworker can edit the file, but your whole company can read it.
Who can access a file:
| Anyone | Any person that gets to the file has access. |
| User | The Blockpad user you specify has access. |
| Company | Anyone in your Blockpad company has access. |
| Anyone with special link | Anyone that gets to the file using the link provided has access. |
Type of access:
| Read only | The person can view but not edit the file. |
| Read as template | The person cannot edit the original file, but is prompted to create their own copy. |
| Read and write | The person can read and make edits to the original file. |
Shared folders
Entire folders can also be shared, granting access to all of the files inside. You can then send links to the files in that folder to the person that you shared the folder with.
Also, the folder will appear in the online files folder of the person it is shared with, so they can access the files inside without a link too.
Set permissions for a folder:
- Navigate to your online files folder.
- Select the folder you wish to share.
- You cannot share your overall personal folder, only sub-folders you've created.
- Click Share on the right side of the page.
- In the page that opens, click New Rule.
- Using the drop down lists, select who can access the file, and what they can do.
- See above for descriptions of the options.
- Click Add Rule.
The desktop environment
Read how to access the desktop app above.
Basic file operations
The Blockpad desktop app handles files like most conventional computer programs. All of the familiar tools are there, e.g.:
- File>New
- File>Open
- File>Save
- File>Save as
Tabs
The Blockpad app window can have multiple files open as tabs that appear at the top of the window. Each of these tabs is a distinct file, not different parts of the same file. (Although it is possible to have one file open in multiple tabs.)

Whenever you use File>Open in the desktop app, the file is opened in a new tab. If you want to return to the file you were just using, click on it's tab at the top of the window.
You can also open a "blank" tab that acts like a home screen. This is what you see when you first open the app. From here, you can see recent files and start new files, among other things.
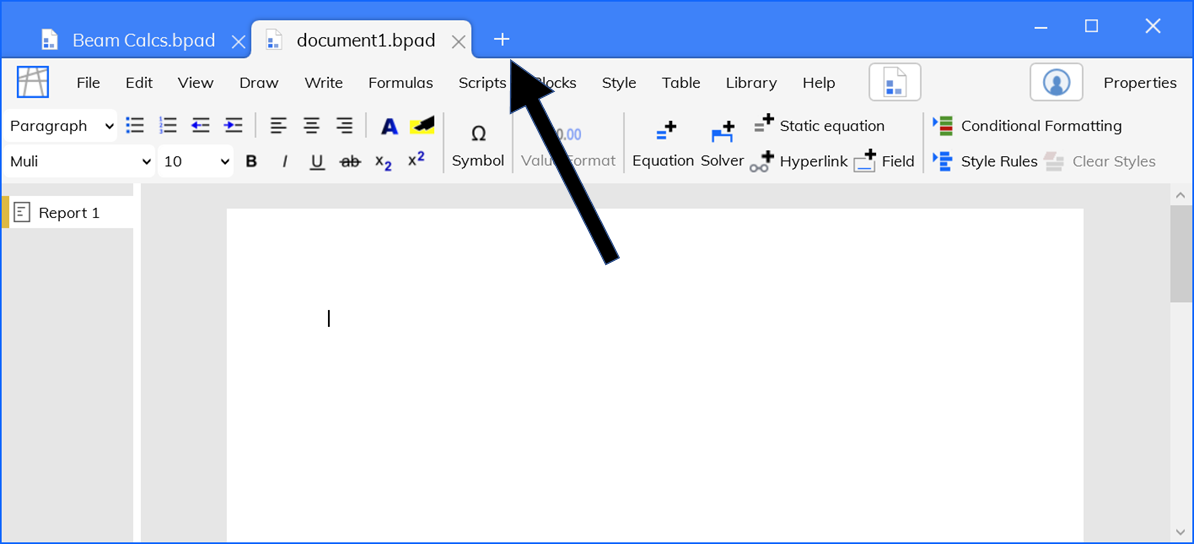
To open a new tab, click the plus (+) sign at the top of the window, to the right of the tabs.
Templates
You can create a template that appears as an option when creating a new file.
Create a template:
- Start with a file you wish to use as a template.
- Select File>Save As Template in the toolbar.
- Type in the name for the template.
- Click OK.
Use a template for a new file:
- Select File>New in the toolbar.
- Select the template you wish to use.
Excel add-in
The excel add-in enables the use of block tables.
To download the excel add-in, check the box for it when downloading the desktop app.
Blockpad file type
Blockpad files are saved as *.bpad files, Blockpad's own XML-based file type.
The *.bpad file type is very transparent, and you can inspect Blockpad files without the actual Blockpad program. If you open a .bpad file in a text editor (like Notepad), you will see all the information in the file clearly encoded.
Importing other file types
Blockpad can import some non-Blockpad file types, specifically Mathcad, Smath, and CSV files.
Mathcad files
Blockpad can import .xmcd and .mcdx Mathcad files.
However, imported Mathcad files should not be treated as ready-to-go calculations. The importer can be quite rough, especially in more complex files. This is partially due to inherent differences between Blockpad and Mathcad, but there is also a lot of room for improvement in the importing tool.
Right now, the Mathcad importer should be treated as a touching-off point for re-creating Mathcad files, not as a way to view and use Mathcad files with Blockpad.
Import a Mathcad file:
- In Blockpad, select File>Open in the toolbar.
- Select the file you wish to open (.xmcd and .mcdx only).
- Click the Edit as Blockpad file button.
SMath files
Blockpad can also import SMath files (*.sm).
Like imported Mathcad files, they should not be treated as ready-to-go calculations. The SMath importer should be treated as a touching-off point for re-creating SMath files, not as a way to view and use SMath files with Blockpad.
Import an SMath file:
- In Blockpad, select File>Open in the toolbar.
- Select the SMath file you wish to open (*.sm).
- Click the Edit as Blockpad file button.
CSV files
Blockpad can open comma-separated value files (CSV).
Open a Mathcad file:
- In Blockpad, select File>Open in the toolbar.
- In the bottom right, change "All supported files" to "CSV (comma-delimited)".
- Select the .csv file you wish to open.
- Click the Edit as Blockpad file button.
Spreadsheet files
Blockpad cannot currently import Excel files, but you can copy/paste values from most conventional spreadsheets, like Excel and Sheets.
To do so, copy the cells in the spreadsheet program (ctrl+c), then move to Blockpad and paste them (ctrl+v) in a spreadsheet or table.
Exporting Blockpad files
Blockpad can save a file to PDF so that you can save a final file output and share it with someone that does not have Blockpad.
Save to PDF:
- In the toolbar, select File>Save to PDF.
- Select which parts of the file to save.
- Select the PDF options.
- Click OK.
Accessibility tags
One of the options for saving to PDFs is "Include accessibility tags". This will export tags in the pdf document for things like image alt text (if you have specified it).
The input formula for each equation will also be saved as a tag that is accessible to a screen reader. Note that while the Blockpad equation tags have the text input for the formula, different screen readers may read the formula differently.
Other print-to-pdf tools
In addition to the Blockpad save to pdf tool, you can use something like Microsoft print-to-pdf to take the print output from Blockpad and turn it into a pdf.
Microsoft Word
There is not currently a file export tool to Microsoft Word. However, copy pasting content from Blockpad to Word works decently in many contexts.
Copy Blockpad equations as Word style equations
By default Blockpad equations copy and paste as images into other programs. However, you can change a setting so that they copy as Word style equations for the purpose of pasting them into Word.
- Click the logo in the top left of the program.
- Select Settings.
- Select Options.
- Check the box for "Copy equations in Word equation format".
Export to Microsoft Excel
There is not currently a file export tool to Microsoft Excel.
You can copy cells from Blockpad tables and spreadsheets and paste them into Excel as values. Note that number values with units will be pasted as text.
Program updates
Updates to the desktop app are made available automatically to anyone with a paid license. When an update is available, you should see a message notifying you of the update when you start the program or open a blank tab.
To see what version of the program you are running, select Help>About in the toolbar.
Notes on every update are listed on the release notes page when a new update is released. If you don't think you've received the latest update, follow the steps below.
Check for updates
- Click the Blockpad icon in the top left and select Check for Updates.
Update channels - Beta or Stable
When managing the Blockpad installation, you have the option to choose between the beta channel and the stable channel. You can also choose to install the previous stable release.
Mature product updates are released to the stable channel.
The beta channel gets more frequent updates, but they are testing versions of the software. So you will have access to new features sooner, but because it is a testing version you may find bugs. Please contact us if you find anything.
Change channel:
- Click the Blockpad icon in the top left and select Manage Installation.
- Select an option for Channel.
- Click Update.
Account
In order to get the most out of Blockpad, you will need to start a Blockpad account. A blockpad account is necessary to purchase licenses, join a company license, and use a personal library.
Starting an account is easy and free, and you can do so with an email and password, or by linking an external account like Microsoft.
New account
You can create a new account with just an email and password. Using an external account, like Microsoft, is also an option.
Create a new account with username and password:
- Go to the Blockpad homepage.
- Click Log in in the top right.
- Click Create a new account.
- Enter your email and password, and click Create account.
Change password
Change password if logged out:
- Go to the Blockpad homepage.
- Click Log in in the top right.
- Click the Forgot your password? link at the bottom of the window.
- Follow steps to change your password.
Change password if logged in:
- Go to the Blockpad homepage.
- Click Account in the top right.
- Click Password and Security.
- Click Change password.
- Enter your current password and new password, then click Update password.
Create an account using an external account
You can use an external acccount, like a Microsoft account, to create a Blockpad account.
At the time of writing, only Microsoft is available.
Create account with external account:
- Go to the Blockpad homepage.
- Click Log in in the top right.
- Click Log in with Microsoft.
- Follow prompts from there.
Link an external account
You can also link an external account to an already existing Blockpad account.
This can make signing on easier, and it can also be more secure if you have two factor authentification with the external account. You will also need to disable logging in with a password in order to get the full effect of two factor authentification.
Link an external account to a Blockpad account:
- Log in to your Blockpad account.
- Click the Account button in the top right.
- Click Password and Security.
- Click Manage linked accounts.
- Select the Microsoft button and follow prompts from there.
Disable logging in with a password:
Requires updating to at least version 1.4 if using the desktop app
- First, follow the steps above for linking an external account.
- Click the Account button in the top right of the blockpad homepage.
- Click Password and Security.
- Click Disable password, and confirm.
- Log out and back in to the desktop app and all web browsers.
- On the desktop app, use the browser-based account linking method available on versions 1.4 and higher.
Licensing
Free license
The Blockpad web app is free to use for anyone, with or without an account, although some limits are applied.
When you register for a Blockpad account, you automatically get a "free license". In addition to using the web app for free, you will also be able to save your files in an online folder (with limits).
In addition to the web app, you can use the desktop app as a file viewer, but you will not be able to make edits to the file without a paid license.
Free trial
A free trial acts as a two week paid license. In that time period, you can download the desktop app and use it to create and edit files. After the free trial ends, the app will become a free file viewer without editing permissions.
If you choose to purchase a paid license, then the permissions on the desktop app will renew, and you will be able to use the full version again. There is no need to re-download the software.
Academic license
We offer an academic license to students and professors. The academic license is completely free, and you will have full use of the software.
If you are professor interested in using Blockpad for the classroom, we'd love to talk to you. Please get in touch through our contact page.
Paid licenses
With a paid license, you can use the full desktop app and web app to create and edit files. You will also have storage for library items and online files.
Using your license to access the app
Access to the desktop app is given based on the user logged in to the app. If the logged-in account has a license asocciated with it, then the app works with full functionality.
If the account does not have a license, then the app becomes read-only. You can open Blockpad files and view them, but you will not be able to edit them.
The app checks the license by periodically connecting to the internet. The internet connection does not need to be constant, so if you have a license, you will be able to work offline. However, you may need to connect from time to time.
Also, because the license is tied to your account and not to a machine, you can have Blockpad downloaded on as many machines as you personally need.
How to purchase
Blockpad licenses are subscription based, paid monthly or yearly. There is also a lifetime license available.
For prices, see our pricing page.
For individuals, the best option is the "Professional license".
Purchase a license for an individual:
- Go to the Blockpad homepage and log in to your account.
- or create an account if you haven't already.
- Click Account in the top right.
- Click App License.
- Click Buy now to the left of the page.
- Select one of the Blockpad professional options.
- Make sure number of seats is 1.
- Click Continue.
- Choose your payment method and follow further instructions.
Lifetime license
When you purchase a lifetime license, you are guaranteed to have Blockpad for the rest of your life. Specifically, we guarantee that you will have access to the version you download, on the computer(s) that you download it on.
For the time being, we provide free updates to anyone with a lifetime license, and you can download it to as many computers as necessary (the license is associated with your account, not a specific computer). However, we reserve the right to charge for updates or new downloads in the future.
Company licenses
To purchase licenses for multiple people, you will need to create a company, purchase licenses, and have your team members join. This is all described below in the company management section.
Company management
Managing licenses for multiple people is done through Blockpad "companies". Blockpad companies also provide a way to share library items and online files with groups of people.
If you have any questions or needs around company management, please contact us.
Create a company
When you create a company, you are automatically set up as the admin. As admin, you can purchase licenses for the company, and add new users.
If you need to change the admin of your company, contact us.
Create a company:
- Go to the Blockpad homepage and log in to your account.
- Click Account in the top right.
- Click Company.
- Towards the bottom, click Start a new company account.
- Type in the company name, and click Create.
Purchase licenses
For licensing, you can purchase "Professional licenses" for each team member through our online purchasing system as admin. However, it can often be cheaper to purchase floating "Enterprise licenses" for teams of 3 or more.
Enterprise licenses are set up manually and purchased with an online invoice. Contact us if you're interested in purchasing an enterprise license.
Purchase professional licenses for a team:
- Go to the Blockpad homepage and log in to your account.
- Click Account in the top right.
- Click Company.
- Select your company listed under My Companies.
- Click Admin panel.
- Click Manage license.
- Select Buy now.
- Specify the number of seats.
- Click Continue.
- Choose your payment method and follow further instructions.
Joining a company
For a team member to access a company license, they will need to join the company. The best way to do this is through a "join-code".
For admin:
Create the join-code:
- Go to the Blockpad homepage and log in to your account.
- Click Account in the top right.
- Click Company.
- Select your company listed under My Companies.
- Click Admin panel.
- Check Allow users to sign up with join-code.
- Copy the join-code and send it to your team, along with the instructions below.
For team members:
Set up a personal account:
- Go to the Blockpad homepage.
- Click on the menu bars in the top right and select Create an account.
- Fill out the form and click Create account.
Join a company with join-code:
- Log in to your Blockpad account.
- Click Account in the top right of the page.
- Click Company.
- Click Join a company group toward the bottom of the page.
- Enter the join-code for your company.
- Click Join.